


A brake pedal that shudders on the Hume, a scraping noise at low speed, or a vehicle that pulls when stopping are not faults to ignore. Knowing how to inspect brake rotors can help you spot obvious trouble early, but brakes are safety-critical. A proper inspection needs more than a quick look through the wheel spokes.
Brake rotors, also called discs, work with the brake pads to slow your vehicle. Every time you brake, pad material grips the rotor surface and turns speed into heat. Over time, that heat and friction wear both parts. For everyday cars, work utes, 4WDs and tow vehicles, the rate of wear depends on driving conditions, vehicle load, brake quality and how the vehicle is used.
Start with the warning signs
Before reaching for tools, pay attention to what the vehicle is telling you. Rotor problems do not always make a noise, and noise does not always mean the rotor is at fault. Pads, calipers, wheel bearings, suspension components and tyres can produce similar symptoms. That is why diagnosis matters.
Common signs worth checking include pedal pulsation when braking, steering wheel shake, a rhythmic scraping sound, reduced braking confidence, pulling to one side, or a burning smell after a normal drive. A light surface rust film after rain or an overnight park is usually normal and often clears after a few controlled brake applications. Rust that remains in patches, around the outer edge, or across a large part of the braking surface is different.
If the brake warning light is on, the pedal is soft, the vehicle needs noticeably more distance to stop, or there is a harsh metal-on-metal grinding noise, do not continue testing it on the road. Arrange an inspection as soon as practical.
How to inspect brake rotors safely
The best visual check is done with the wheel removed. Looking through an alloy wheel can reveal deep grooves or heavy rust, but it will not show the whole rotor or tell you whether it is within its safe thickness limit.
Park on level ground, select Park or first gear, apply the handbrake where appropriate, and chock the wheels. Use the vehicle’s correct jacking points and support it on rated jack stands. Never work under a vehicle supported only by a jack. Loosen the wheel nuts before lifting, remove the wheel, and keep the nuts somewhere clean.
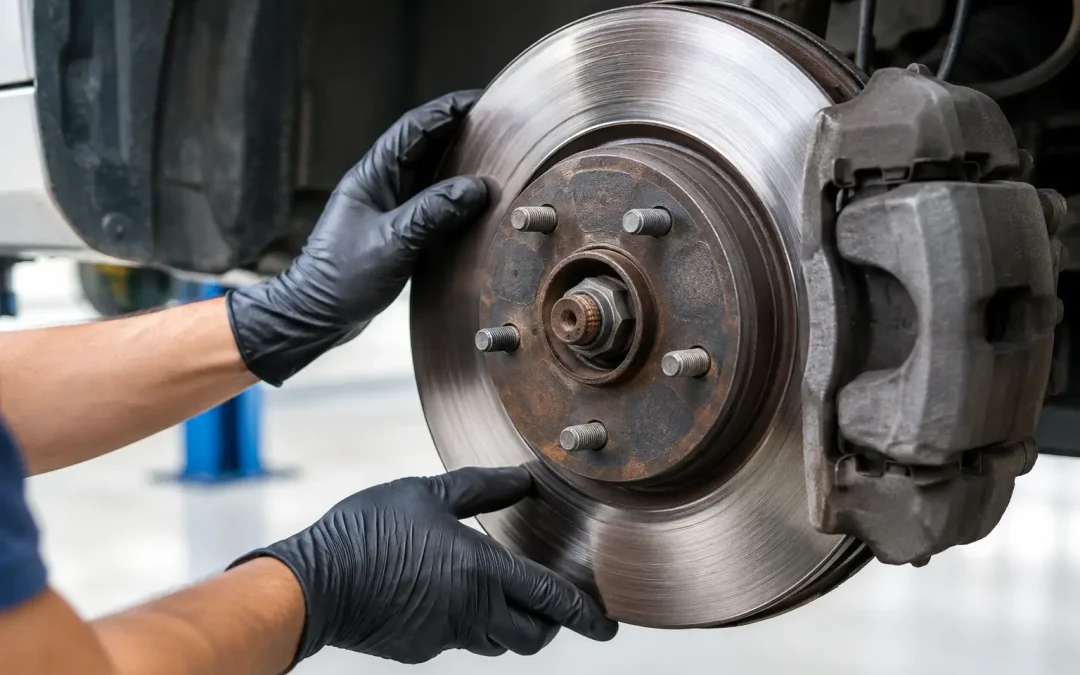
With the wheel off, inspect both faces of the rotor where possible. The inner face is often missed, yet it can wear more heavily than the outer face when a caliper slide, piston or pad is not moving correctly. Turn the rotor by hand and use a torch to check around its full circumference.
Check the rotor surface
A healthy rotor surface is generally smooth with fine, even wear marks. It does not need to look polished, but it should not have serious damage.
Look for deep grooves you can catch with a fingernail, scoring, cracks, raised edges, blue or purple heat marks, pitting, and sections with a noticeably different finish. Fine circular marks can be normal. Deep scoring usually means the pads have worn down too far, debris has become trapped, or there is another issue with the braking system.
Blue spots or dark patches suggest the rotor has been overheated. This can happen after repeated heavy braking, towing, descending long hills, a sticking caliper, or an unsuitable brake setup for the vehicle’s load. Heat damage may affect how consistently the brakes work, even if the rotor still appears thick enough at a glance.
Cracks require particular care. Small surface crazing can occur on vehicles that work hard, but visible cracks spreading across the braking face, cracks near drilled holes, or cracking at the rotor hat should be assessed by a brake specialist. Do not assume a cracked rotor is safe because the vehicle still stops.
Feel for a wear lip and check rust
Run a finger carefully around the outer edge of the rotor. A small lip can develop as the pad wears the braking surface. A pronounced lip is a sign of wear, but it does not tell you the remaining thickness on its own. The same applies to an inner lip, which may be harder to see without removing the caliper.
Inspect the rotor hat and centre section for corrosion too. In regional areas, vehicles that travel on gravel, sit outdoors, tow boats, or see muddy 4WD tracks can develop significant corrosion. Heavy corrosion can weaken the rotor or stop it sitting squarely against the hub, which can contribute to brake vibration.
Inspect the pads and caliper at the same time
Rotors and pads should be assessed as a system. Check whether the pad material is wearing evenly between the inner and outer pads. Uneven wear may point to seized caliper slides, a sticking piston, damaged hardware or a hose issue. Fitting new rotors without correcting the underlying fault can leave you back at the workshop sooner than you should be.
Also look for pads that are very thin, cracked, glazed or contaminated with oil or brake fluid. Brake dust is normal. Wetness around the caliper, hose or bleeder screw is not. Any suspected fluid leak should be inspected promptly.
Measure rotor thickness properly
The most important rotor measurement is thickness. Every rotor has a minimum thickness specification, often marked on the rotor hat, listed in workshop data, or supplied by the vehicle manufacturer. Once the rotor is below that limit, it must be replaced. It cannot be made safe by fitting new pads.
Use a brake micrometer, not a tape measure or ordinary vernier callipers. Measure in several places around the rotor, staying clear of the unworn outer lip. Compare the readings with the manufacturer’s minimum specification and allowable thickness variation.
Thickness variation matters because a rotor can be above minimum thickness yet still have uneven material across its face. This can contribute to pedal pulsation. The cause is not always a physically “warped” rotor. Uneven pad deposits, overheating, hub run-out and poor installation can all create a similar feeling through the pedal.
A workshop will normally use a dial indicator to measure lateral run-out – the side-to-side movement of the rotor as it turns. This is a precise test. It requires a clean hub face, correct wheel bearing condition and the right specifications for the vehicle. It is not something most home garages can judge accurately by eye.
When rotors should be replaced
Rotors are commonly replaced when they are under minimum thickness, badly scored, heat damaged, cracked, severely corroded, or have excessive run-out or thickness variation. Pads are usually replaced with the rotors, because old pads may not bed correctly onto a new braking surface.
Machining rotors can sometimes be an option, but only when enough material remains after machining and the rotor is otherwise sound. On many modern vehicles, replacement is the better long-term choice. Labour, material limits and the importance of reliable stopping performance all need to be considered. The cheapest immediate option is not always the one that lasts.
For 4WDs carrying larger tyres, towing caravans or boats, or operating at a higher GVM, standard replacement parts may not be the right answer. Extra mass and heat place greater demand on the braking system. A quality matched pad and rotor upgrade can improve heat control and braking consistency, but it needs to suit the vehicle and how it is actually used.
Do not overlook installation and bedding-in
A new rotor can develop problems early if it is installed poorly. The hub surface must be cleaned, rotor run-out checked where required, fasteners tightened correctly, and pads bedded in according to the component supplier’s procedure. Grease or dirt between the hub and rotor can create run-out from day one.
After brake work, avoid hard stops unless necessary during the initial bedding-in period. Controlled braking helps transfer an even layer of pad material to the rotor. This gives the best chance of quiet, consistent braking and a longer service life.
If your vehicle is shuddering, squealing, pulling or simply due for a brake check, a proper inspection is worth more than guesswork. The team at Albury Brake and Clutch Centre can measure the rotors, inspect the full braking system and give you straight answers about what needs attention now and what can wait.