


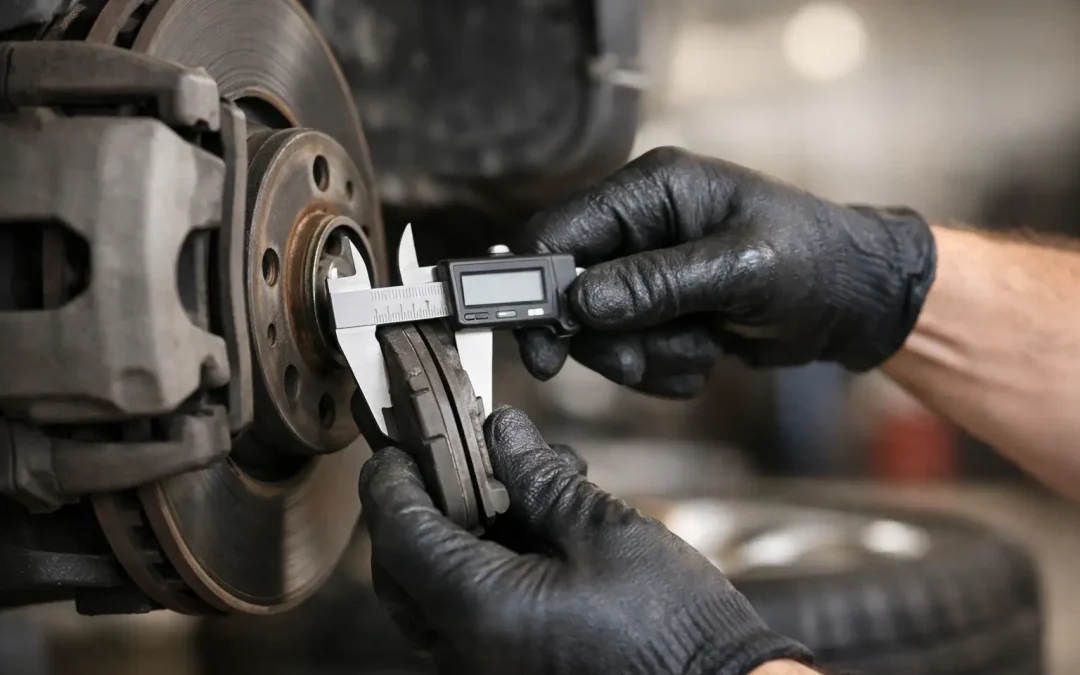
A brake pad can look acceptable through the wheel spokes and still be close to worn out. The usable friction material may be hidden, the inner pad can wear faster than the outer one, and a worn disc lip can make a quick visual check misleading. Knowing how to measure brake pads gives you a better idea of their condition, but the measurement needs to be taken in the right place and interpreted properly.
Brakes are not an area for guesswork. If you are hearing grinding, feeling a vibration through the pedal, pulling to one side, or seeing a brake warning light, book an inspection rather than relying on a driveway check. Those symptoms can point to more than pad wear.
What You Are Actually Measuring
A disc brake pad has two main layers: the steel backing plate and the friction material that presses against the brake disc. Only the friction material counts when measuring remaining pad thickness. Do not include the backing plate in your measurement.
Most passenger vehicles start with roughly 10 to 12 mm of friction material, though this varies between vehicle makes, pad designs and applications. As a practical rule, pads at 3 mm should be inspected and planned for replacement soon. At around 2 mm, replacement is generally urgent. Waiting until the pad is completely worn can damage the brake disc, add substantially to the repair cost and reduce braking performance.
The exact replacement point depends on the vehicle manufacturer’s specifications, pad design and how the vehicle is used. A family SUV doing school runs has different brake demands from a loaded 4×4 towing a caravan through the High Country. The number matters, but so does the full condition of the braking system.
Tools Needed to Measure Brake Pads
For an initial check, a good torch and a small inspection mirror may be enough. To get a reliable reading, use a brake pad thickness gauge or vernier calipers. A pad gauge is simple to use and lets you compare the friction material to marked thickness ranges without dismantling the brakes.
If the wheel needs to come off, you will also need a jack rated for the vehicle, axle stands, wheel chocks and the correct wheel brace or socket. Never work under a vehicle supported only by a jack. Park on level ground, select Park or first gear, apply the parking brake where appropriate and chock the wheels that remain on the ground.
Be careful with brake dust. Avoid blowing it out with compressed air or brushing it around dry. Wear gloves and a suitable mask if you are working close to the brake assembly, and clean components using an appropriate brake cleaner only.
How to Measure Brake Pads Without Removing the Wheel
Many alloy wheels have enough open space between the spokes to see the outer brake pad. Shine a torch through the wheel and locate the brake caliper clamped over the edge of the brake disc. The pad friction material sits between the disc and the metal backing plate.
Use the inspection mirror if the viewing angle is tight. Estimate the thickness of the friction material at its thinnest visible point, not at a thick edge. If you have a pad gauge that fits through the wheel, gently place it against the material to take a reading.
This is a useful screening check, not a complete diagnosis. You will usually only see the outer pad, while the inner pad can wear more quickly if the caliper slide pins are sticking, the piston is not retracting correctly or the pad is binding in its bracket. Rear brakes can also be harder to inspect, particularly on vehicles with an electronic parking brake or enclosed caliper design.
If the outer pad appears to be near 3 mm, do not assume the other side is the same. Arrange a proper inspection before a long trip, towing job or regular heavy use.
How to Measure Brake Pads With the Wheel Removed
Removing the wheel gives you a much clearer view, but it also creates more safety responsibilities. If you are not comfortable lifting and supporting the vehicle correctly, leave this part to a workshop.
With the vehicle secure on axle stands and the wheel removed, identify both the inner and outer pad. Inspect the friction material on each one. Place the jaws of a vernier caliper across the friction material only, keeping the tool square to the pad. Record the reading in millimetres.
Measure more than one point on each pad. Pads can wear unevenly from front to back or from the top to the bottom. A pad that reads 4 mm at one end and 2 mm at the other should not be treated as a healthy 4 mm pad. The thinnest point is what matters.
Check the pads on both sides of the axle too. Braking systems should wear broadly evenly across the left and right sides. A significant difference can indicate a seized caliper, restricted brake hose, sticking slides, contaminated pad or another fault that will not be fixed simply by fitting new pads.
Check More Than Pad Thickness
Pad thickness is only one part of a worthwhile brake inspection. Look at the surface of the brake disc. Deep grooves, blue heat marks, cracking, heavy rust or a pronounced outer lip all deserve attention. A disc can look smooth from the outside yet be below its minimum thickness or have excessive runout, which is why accurate measurement is important.
Also inspect the pad surface. Crumbling material, cracks, glazing or fluid contamination can reduce braking effectiveness even when there appears to be plenty of material left. A shiny, glass-like pad surface may be glazed from overheating. This can cause squealing, poor initial bite or a hard pedal feel.
Listen for the wear indicator as well. Many pads have a small metal tab designed to squeal against the disc as the material gets low. Some vehicles use electronic wear sensors. Neither system replaces a physical inspection, but both should be acted on promptly.
Uneven Wear Is a Fault Clue
Uneven pad wear is not just an inconvenience. It is useful diagnostic information. Inner pads worn much thinner than outer pads commonly point to seized or dry caliper slide pins. One pad worn at an angle may mean the pad is binding in the carrier or the caliper is not moving freely.
On 4x4s, utes and vehicles used for towing, extra load and heat can expose brake issues sooner. Larger tyres, increased GVM, long descents and stop-start towing all ask more from the braking system. In these cases, the right pad compound, disc condition and caliper operation matter just as much as the remaining pad measurement.
When to Replace Brake Pads
Replace pads when they are at or below the vehicle maker’s service limit, when the thinnest section is around 3 mm, or earlier if there is uneven wear, noise, contamination or damaged friction material. Do not wait for grinding. Grinding often means the friction material has worn away and the backing plate is contacting the disc.
Pads should normally be replaced as an axle set. Replacing only one pad can create uneven braking and unpredictable performance. Depending on the disc thickness, surface and runout, the discs may need machining or replacement at the same time. Fitting new pads to badly worn discs is a false economy and can lead to noise, poor bedding-in and shortened pad life.
A quality repair also includes checking caliper movement, hardware, hoses, fluid condition and the cause of any abnormal wear. That is the difference between changing parts and fixing the braking system properly.
When a Workshop Inspection Is the Better Option
A home check is reasonable if you want to monitor normal wear, but some jobs need specialist equipment and diagnosis. Book in if you cannot clearly see both pads, if one side is wearing faster, if the brake pedal has changed feel, or if the vehicle shudders under braking.
The same applies if a warning light is on, brake fluid is low, the vehicle pulls under brakes, or there is a burning smell after a drive. These are safety-critical signs, not issues to put off until the next service.
At Albury Brake and Clutch Centre, a brake inspection looks beyond the remaining millimetres. The aim is to identify why the pads have worn as they have, then recommend only the work needed to keep the vehicle safe and dependable.
A quick measurement can help you plan ahead, especially before a holiday run, a towing trip or a busy period at work. But if the reading is close, uneven or difficult to see, the sensible next step is a proper brake check. Clear answers now are cheaper and safer than discovering worn-out brakes when you need them most.